
Creating a Gallery Wall: Tips for Displaying Your Favorite Art and Photos
A gallery wall is more than just a decorating trend—it's a powerful way to showcase your personality, creativity, and memories. Whether you’re a photography enthusiast, a collector of art prints, or simply someone who loves a well-curated wall, creating a gallery wall can transform a blank space into a captivating focal point.
In this guide, you’ll learn everything you need to know about designing, planning, and installing a gallery wall in your home—without hiring a professional or breaking the bank.
Why a Gallery Wall?
Gallery walls serve several purposes in home decor:
- Personal Expression: They allow you to tell your story through art, photos, and objects.
- Visual Interest: A gallery wall adds depth and texture to an otherwise plain wall.
- Flexibility: You can adapt, expand, or rearrange them over time.
- Affordability: Gallery walls can be created on a budget using prints, DIY art, or thrifted finds.
Whether you're working with a small apartment wall or a spacious stairwell, there’s a gallery wall style that will work for your space.
Step 1: Choose the Right Wall
Before selecting frames or artwork, identify where your gallery wall will go. Ideal locations include:
- Living rooms: Over a sofa or sideboard
- Hallways: Long walls benefit from linear or grid layouts
- Bedrooms: Above the bed or opposite the headboard
- Staircases: Follow the rise of the stairs with staggered pieces
- Home offices: Create an inspiring workspace with visual flair
Tips:
- Choose a wall with good lighting (natural or artificial).
- Avoid areas with excessive moisture (like directly over a stove or in a bathroom).
- Measure the wall to understand your working space and proportions.
Step 2: Decide on a Theme or Style
While gallery walls celebrate eclecticism, having a unifying concept can keep the look cohesive.
Common Themes:
- Color-based: Stick to a palette (e.g., black and white, earth tones, bold colors).
- Frame style: Use matching frames, all-black frames, or a mix of woods and metals.
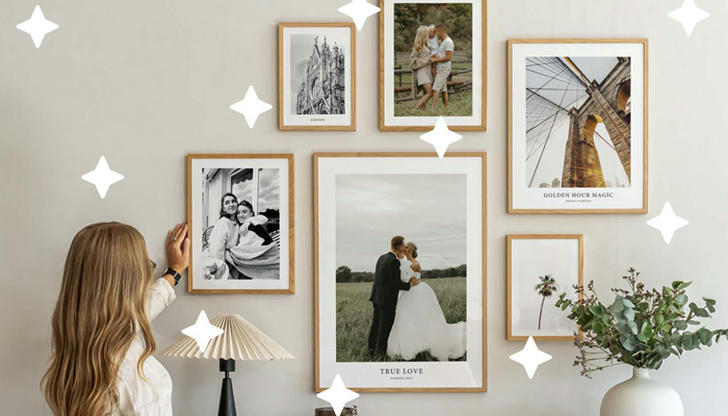
- Content type:
- Family photos
- Art prints
- Typography or quotes
- Travel souvenirs or maps
- Children’s artwork
Pro Tip: If mixing media (e.g., photos + art), ensure they share at least one visual commonality—like matting, color scheme, or frame shape.
Step 3: Curate Your Content
Choose pieces that not only look good together but that you genuinely love.
What to Include:
- Photos: Family portraits, travel snapshots, candid moments
- Art: Prints, paintings, or drawings—originals or reproductions
- Objects: Small mirrors, clocks, plates, or fabric swatches
- Text-based elements: Quotes, song lyrics, book pages
You don’t need to buy everything at once. A meaningful gallery wall can evolve over time as you collect pieces that resonate with you.
Step 4: Choose the Layout
There are several popular gallery wall layouts, each with a different vibe.
Layout Styles:
| Style | Description |
|---|---|
| Grid | Symmetrical rows and columns. Works well with identical frames. |
| Linear | Aligned along a horizontal or vertical center line. Great for hallways. |
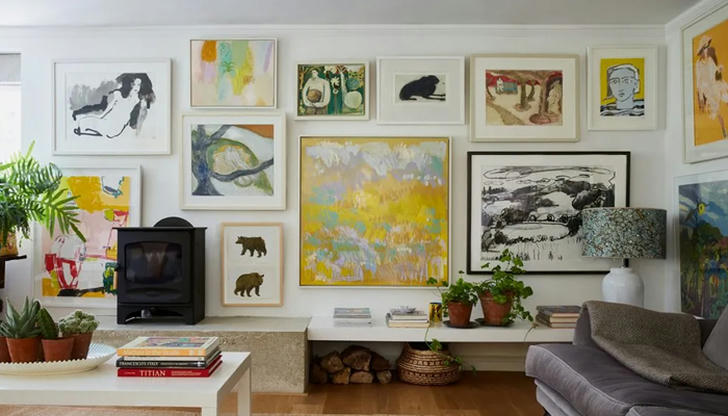
| Salon/Organic | Freeform arrangement with varied sizes. Dynamic and artsy. |
| Staircase | Follows the incline of stairs. Frames increase in height with each step. |
You can use paper templates or painter’s tape to mock out the layout on the wall before hanging.
Tip: Leave 2–4 inches between frames for a balanced, breathable look.
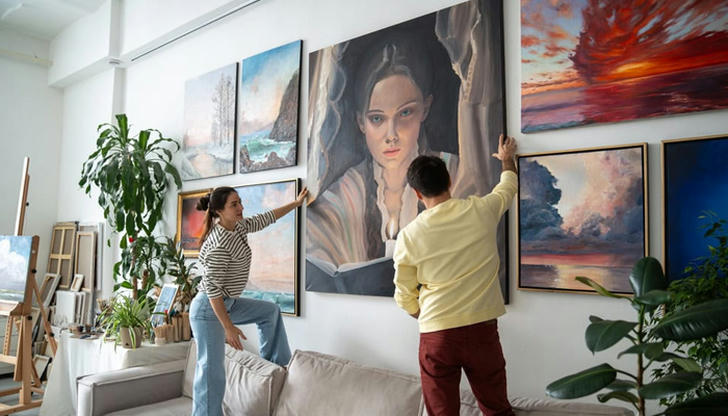
Step 5: Frame It Right
Framing plays a major role in the final aesthetic.
Frame Considerations:
- Consistency: Use similar styles for cohesion or mix for a curated look.
- Matting: Adds white space and polish; elevates smaller prints.
- Glass or Plexi: Choose UV-protective materials to prevent fading.
Affordable frames can be found at IKEA, Target, Michael’s, or thrift stores. You can also spray paint mismatched frames for uniformity.
Step 6: Plan Before You Hang
Don’t start hammering until you’ve finalized the plan.
Mock-Up Method:
- Cut paper to the size of each frame.
- Label them and tape to the wall.
- Rearrange until the layout feels balanced.
Alternatively, lay everything out on the floor and take a photo from above to visualize.
Spacing Rules:
- Maintain equal spacing between items.
- Aim for the center of the arrangement to be about 57 inches from the floor (standard gallery eye-level).
- Start from the center and work outward.
Step 7: Install with Confidence
Depending on the weight of your frames and your wall type (drywall, plaster, concrete), you may need different hardware:
- Small frames (under 5 lbs): Adhesive hooks, sawtooth hangers
- Medium (5–15 lbs): Picture hanging kits, nails with wall anchors
- Heavy items: Use screws and drywall anchors or command strips rated for higher weight
Use a level, ruler, and pencil for accuracy. If you’re not confident with tools, consider using removable picture-hanging strips for no-damage mounting.
Bonus: Light It Up
Gallery walls look even more dramatic with lighting:
- Picture lights: Mounted above frames
- Track lighting: Adjustable heads that can highlight artwork
- LED strips: Subtle accent behind or under shelves
Avoid direct sunlight exposure to prevent fading, especially for photos or original artwork.
Common Mistakes to Avoid
- Cluttered look: Too many items in too small a space can overwhelm.
- Inconsistent themes: Without a common thread, pieces can feel disconnected.
- Bad mounting: Crooked or off-center frames disrupt the overall effect.
- Not planning: Random hanging without a mockup often leads to regret.
Ideas for Different Rooms
Living Room:
- Mix family photos with abstract art and quotes.
- Choose large frames to fill bigger wall space.
Bedroom:
- Use calming artwork like nature scenes or black-and-white photography.
- Place above the bed or across from it for symmetry.
Kids’ Room:
- Include children's drawings, name prints, and bright colors.
- Consider lightweight or unbreakable frames.
Entryway:
- Feature a single line of frames for a bold first impression.
- Add mirrors or hooks for functional style.
Affordable Gallery Wall Ideas
- Print from online services like Shutterfly or Snapfish.
- Use free printable art from websites like Unsplash or The Met’s Open Access.
- Frame fabric swatches, wallpaper samples, or old calendars.
- Buy digital art on Etsy and print it yourself.
Maintaining Your Gallery Wall
- Dust regularly to avoid buildup on glass and frames.
- Rotate seasonal prints to refresh the look.
- Add new photos over time to keep it dynamic.
Final Thoughts
Creating a gallery wall is one of the most satisfying DIY home decor projects. It allows you to blend art, photography, and personality into a visual story that is uniquely yours. With thoughtful planning and creative flair, you can transform a plain wall into a stunning centerpiece of your home.
Whether you’re going for a sleek grid, an eclectic salon-style arrangement, or a bold monochrome photo wall, the most important rule is to choose pieces that make you smile.
“A gallery wall is not just decoration—it’s a collection of memories, dreams, and inspiration displayed proudly in your home.”